 Sven Malvik
Knowing about Azure Bastion is part of the AZ-303 exam for becoming an Azure Solution Architect. Bastion is very useful in cases where you would normally spin up a jump host towards a Virtual Machine that you want to maintain. Using Azure Bastion means you won’t need to maintain a separate virtual machine (Jump Hos).
 Watch how to use Azure Bastion in preparation for the AZ-303 exam
Before we look into Azure Bastion, we need a virtual network. Let’s create one.
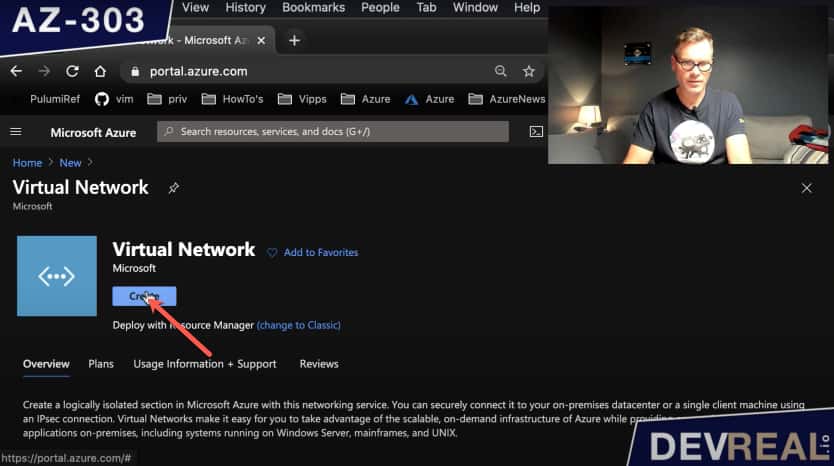 Creating a VNet
The VNet comes already with a pre-defined subnet that we can change if we want to. As it’s not important for this demonstration, I leave it as is.
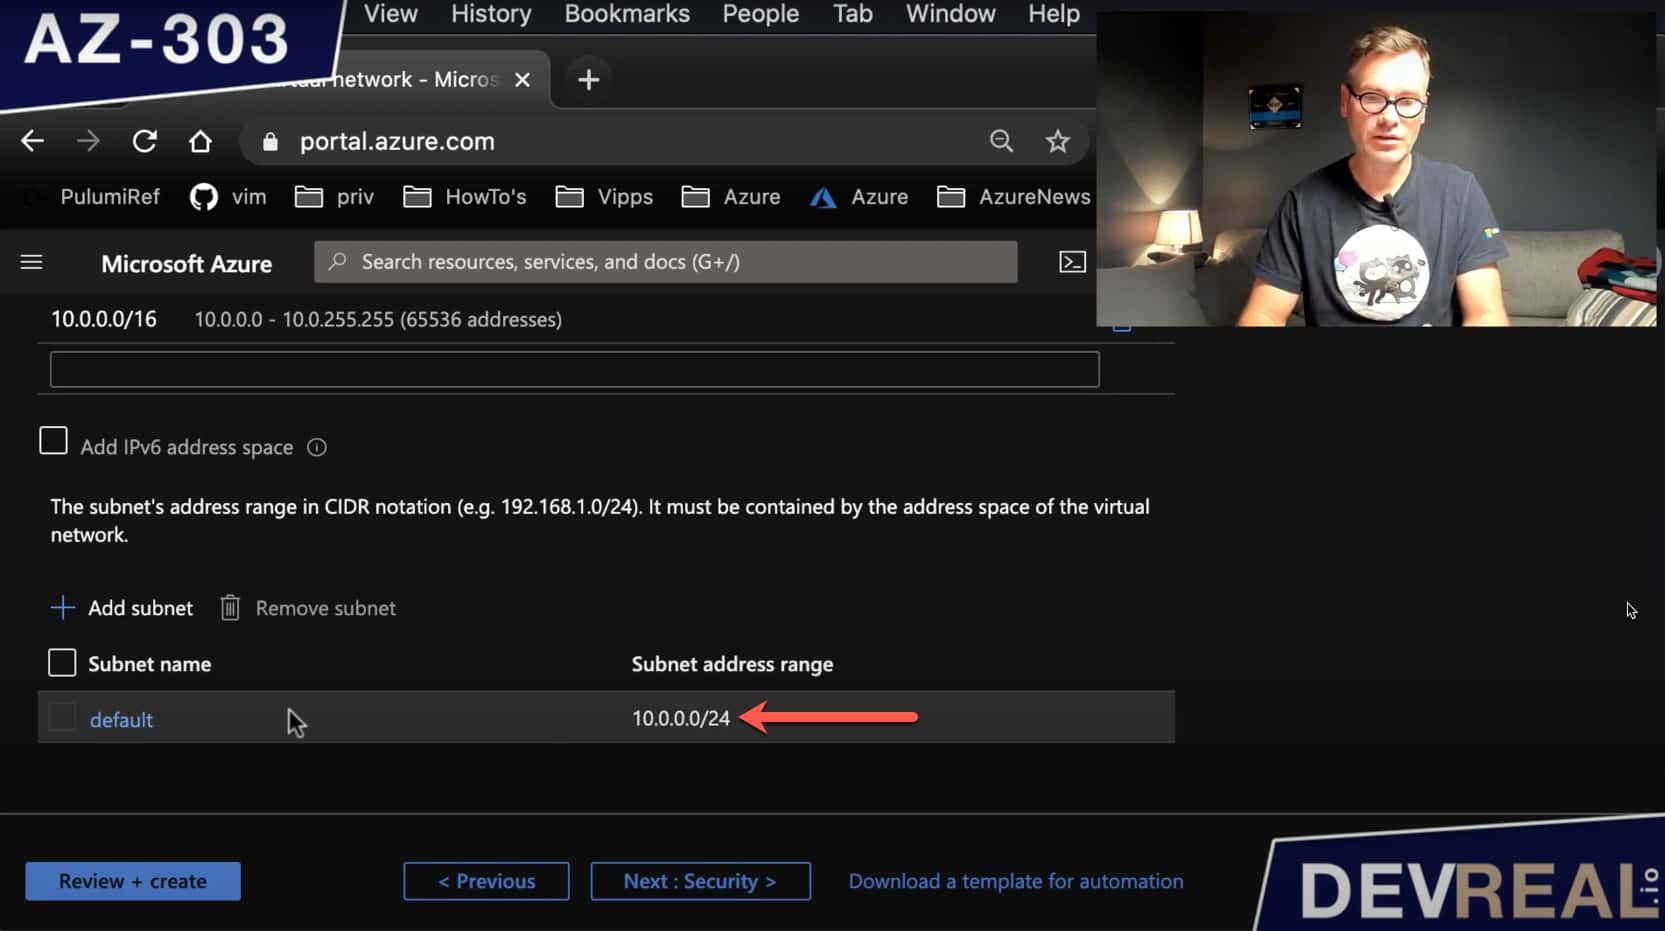 Default subnet of an Azure Virtual Network
If we head over to the Security-tab, we can see (1) BastionHost. We need to enable it. The address range must be at least /27. I stick to the default for this demonstration. Azure Bastion needs also a public IP address, so we can connect to it from outside our virtual network.
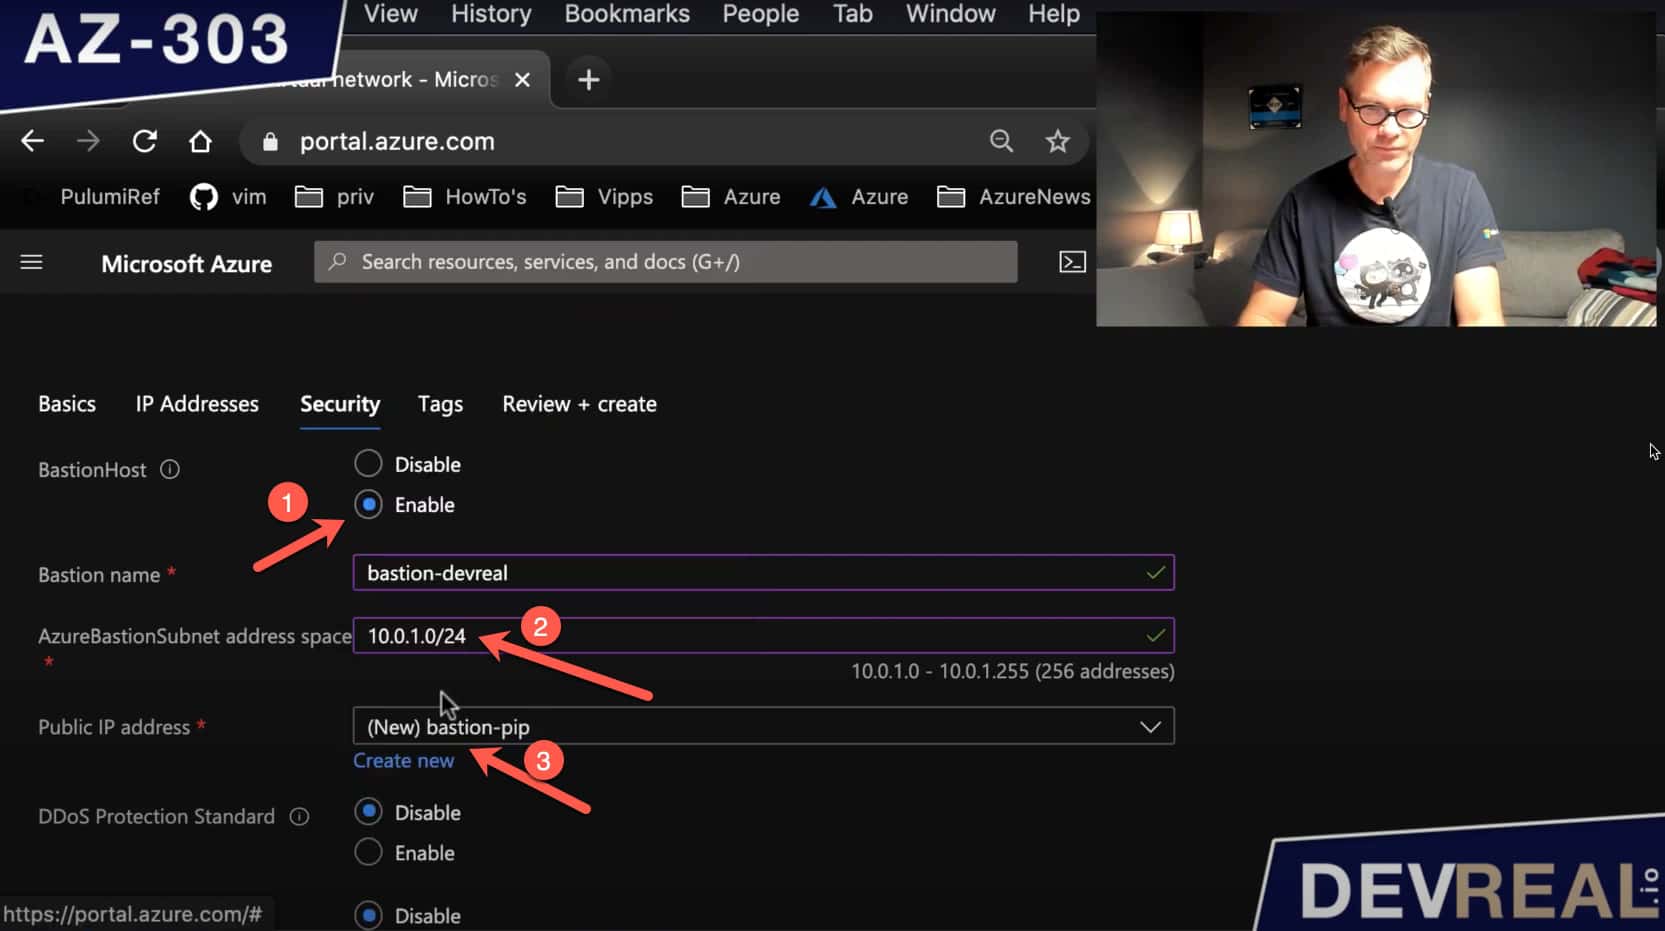 Configuring Virtual Network
After we have created the VNet, we take a look at the subnets, and we can see that we got two. The default-subnet and one for Azure Bastion. This name of this subnet must be AzureBastionSubnet. This is important to remember in case where you set up a subnet for Azure Bastion manually.
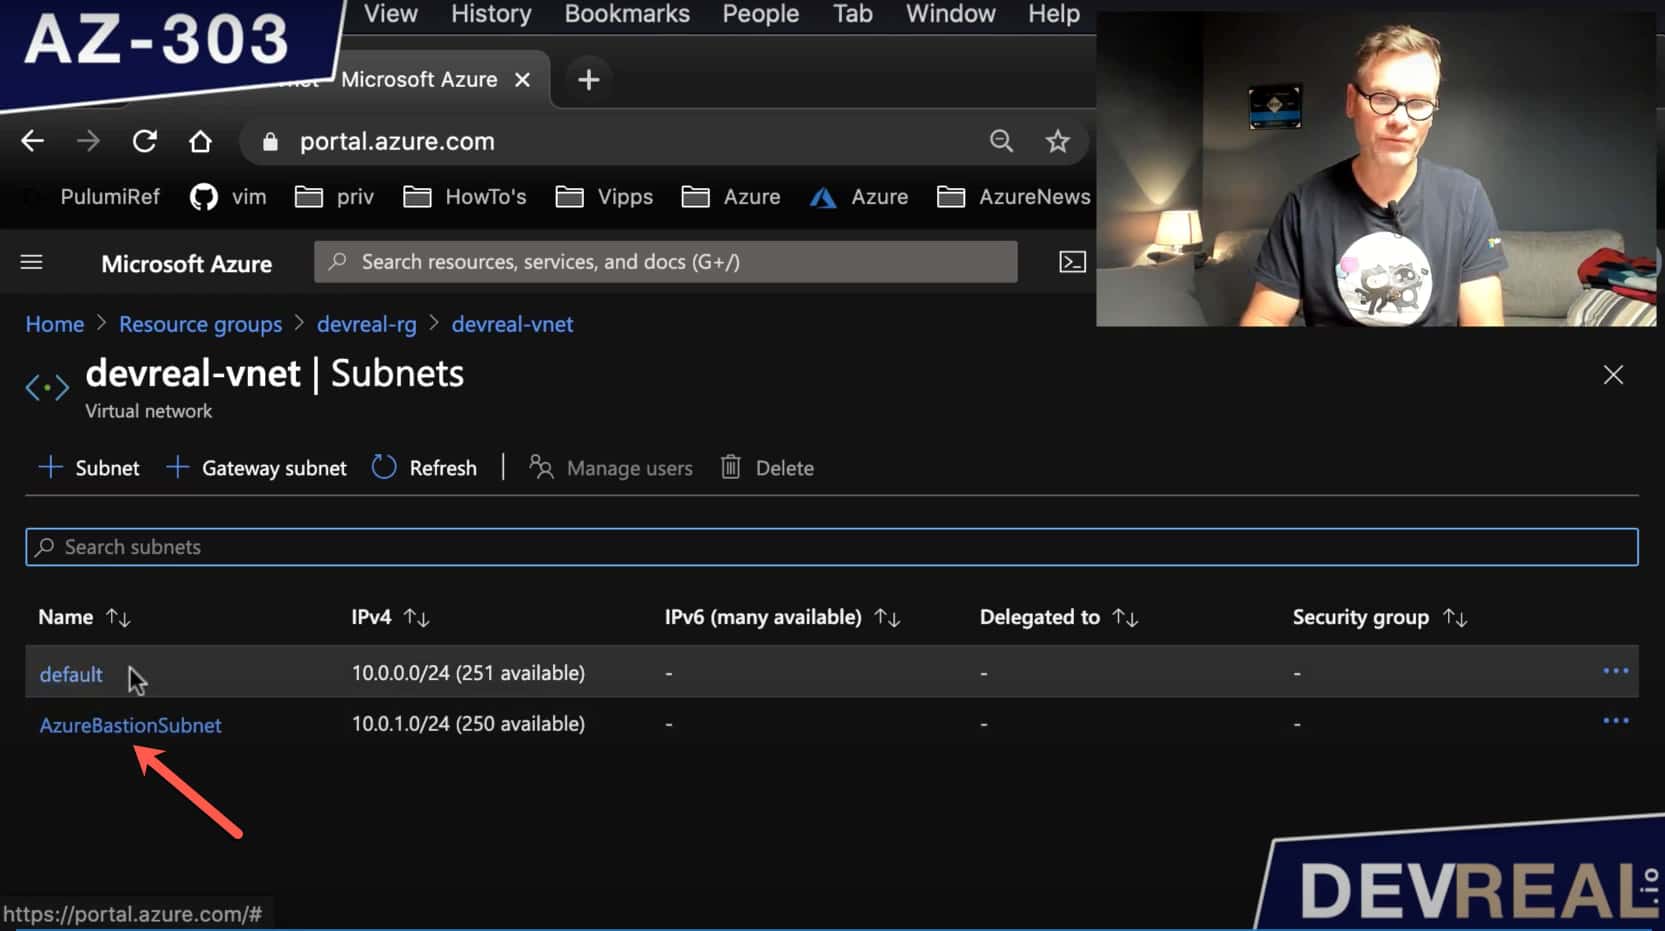 Azure Bastion Subnet
Let’s now create a virtual machine within the default-subnet that we want to login to from Azure Bastion. I chose the Windows Server 2016 Datacenter, but you can choose Ubuntu or any other type if you want to.
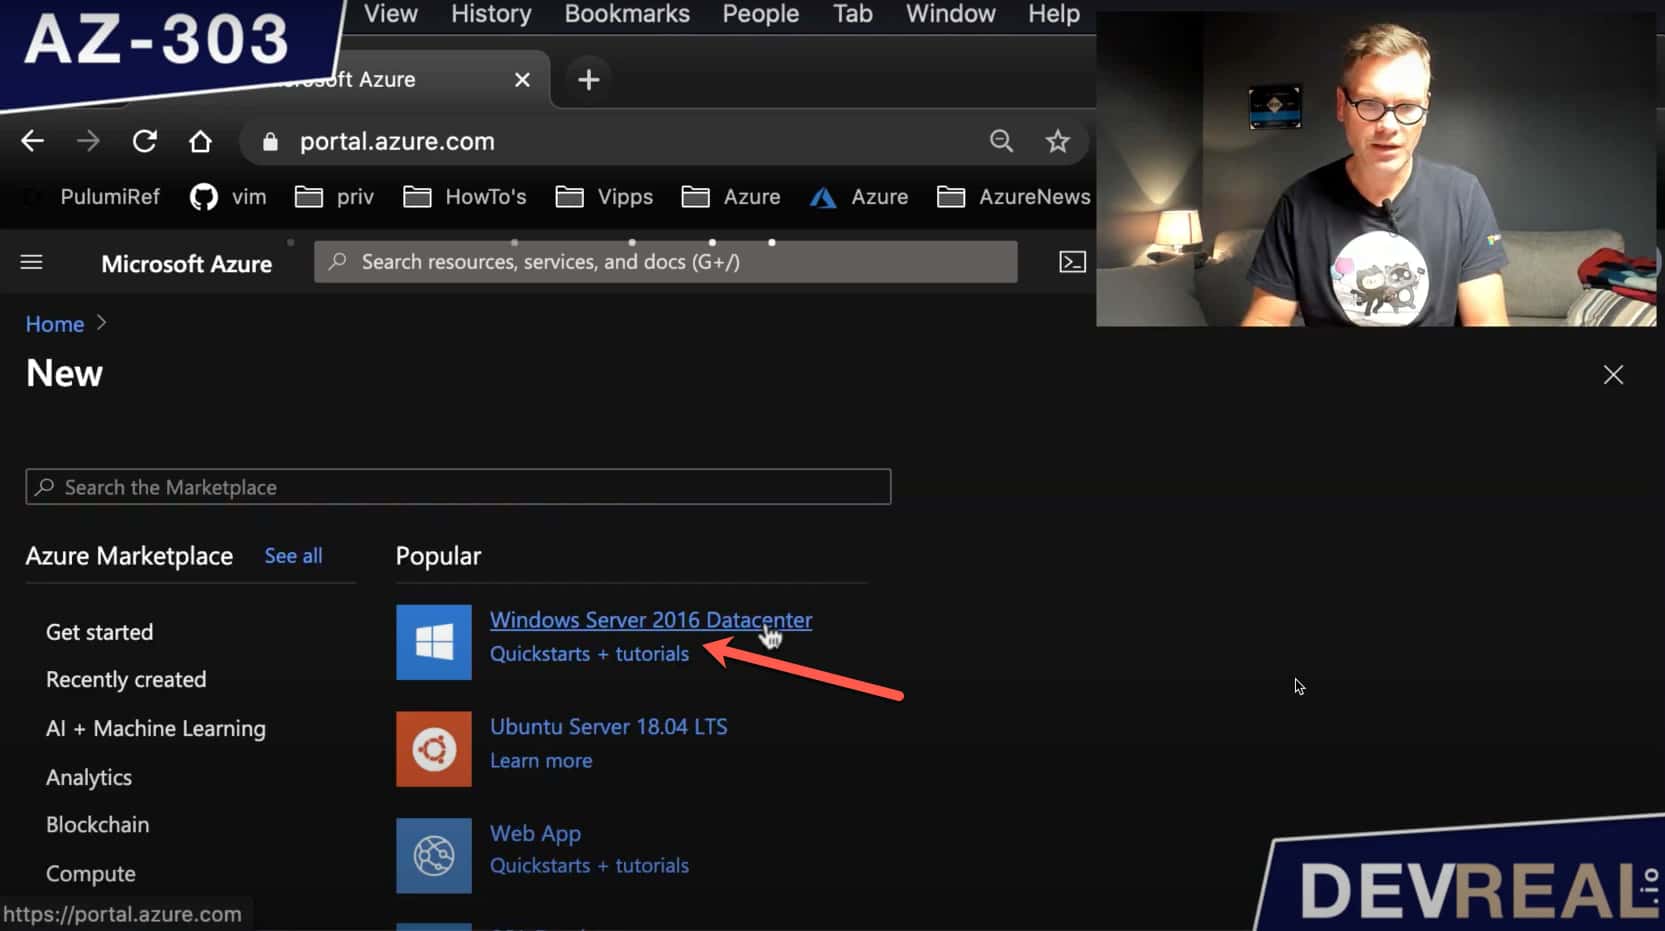 Create Windows Server 2016 Datacenter VM
We need the RDP (Remote Desktop Protocol) port 3389. It’s the port for connecting to the machine. This entry will be opened in the Network Security Group (NSG), which is another Azure resource. We’ll take a look at it later, and change it a bit. NSG rules act like a firewall.
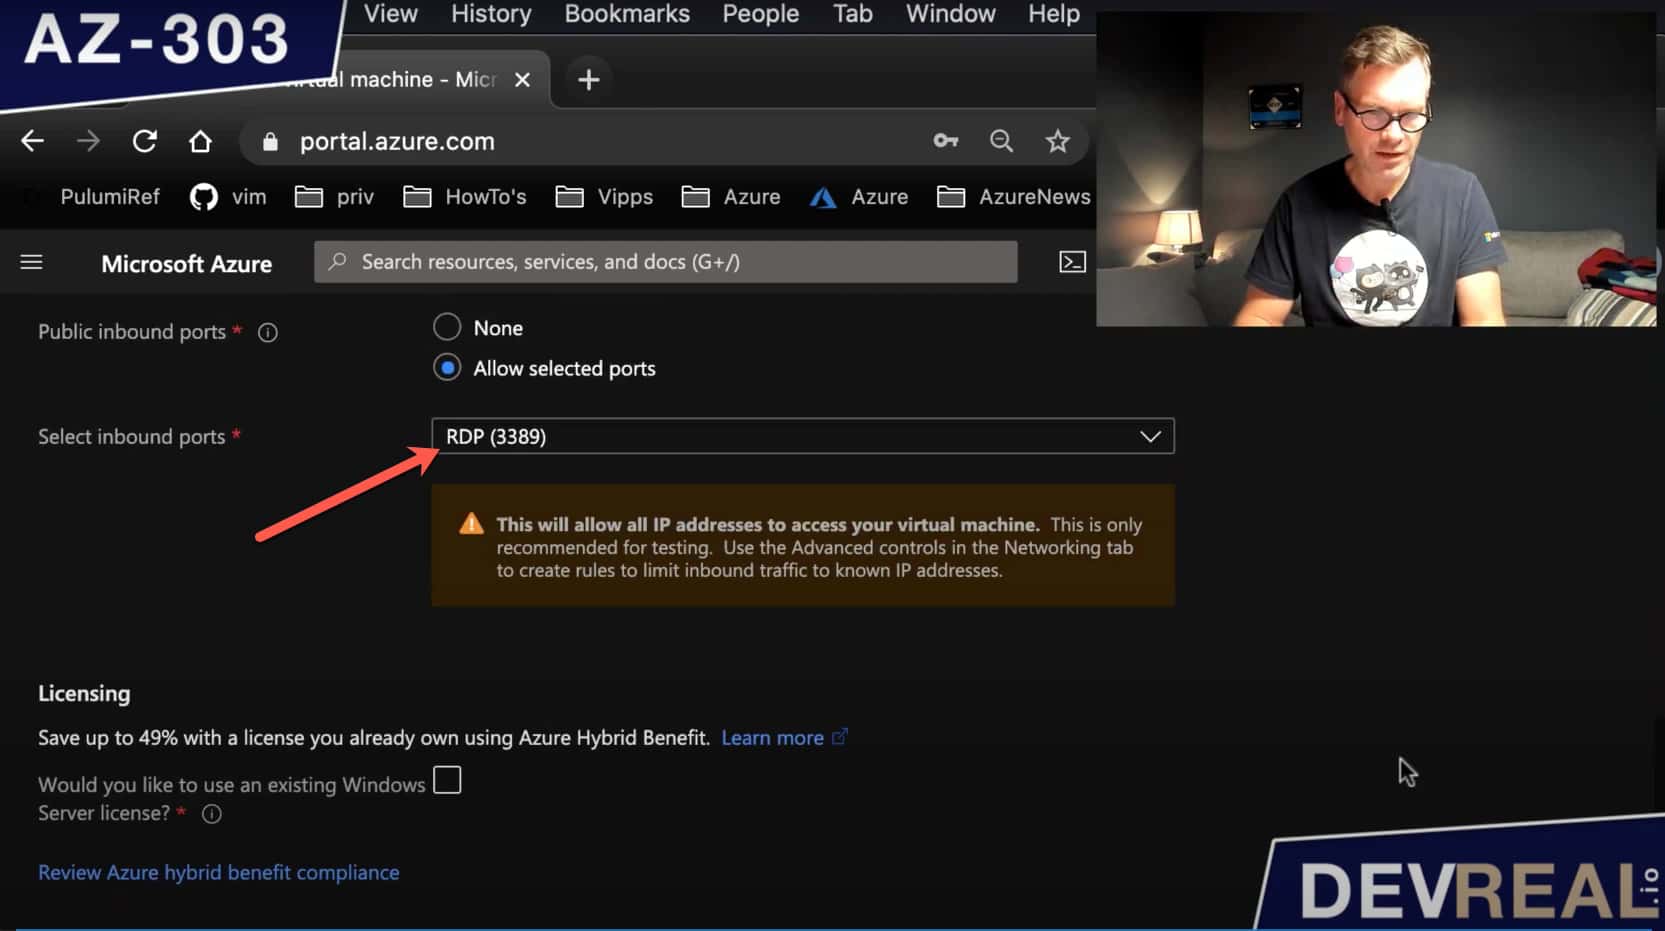 Configuring RDP port
Then, we select the Network-tab where we set the Public IP to None. We don’t want our VM to be open for everyone. We will also stick to the defaults for the NSG, and re-configuring it later.
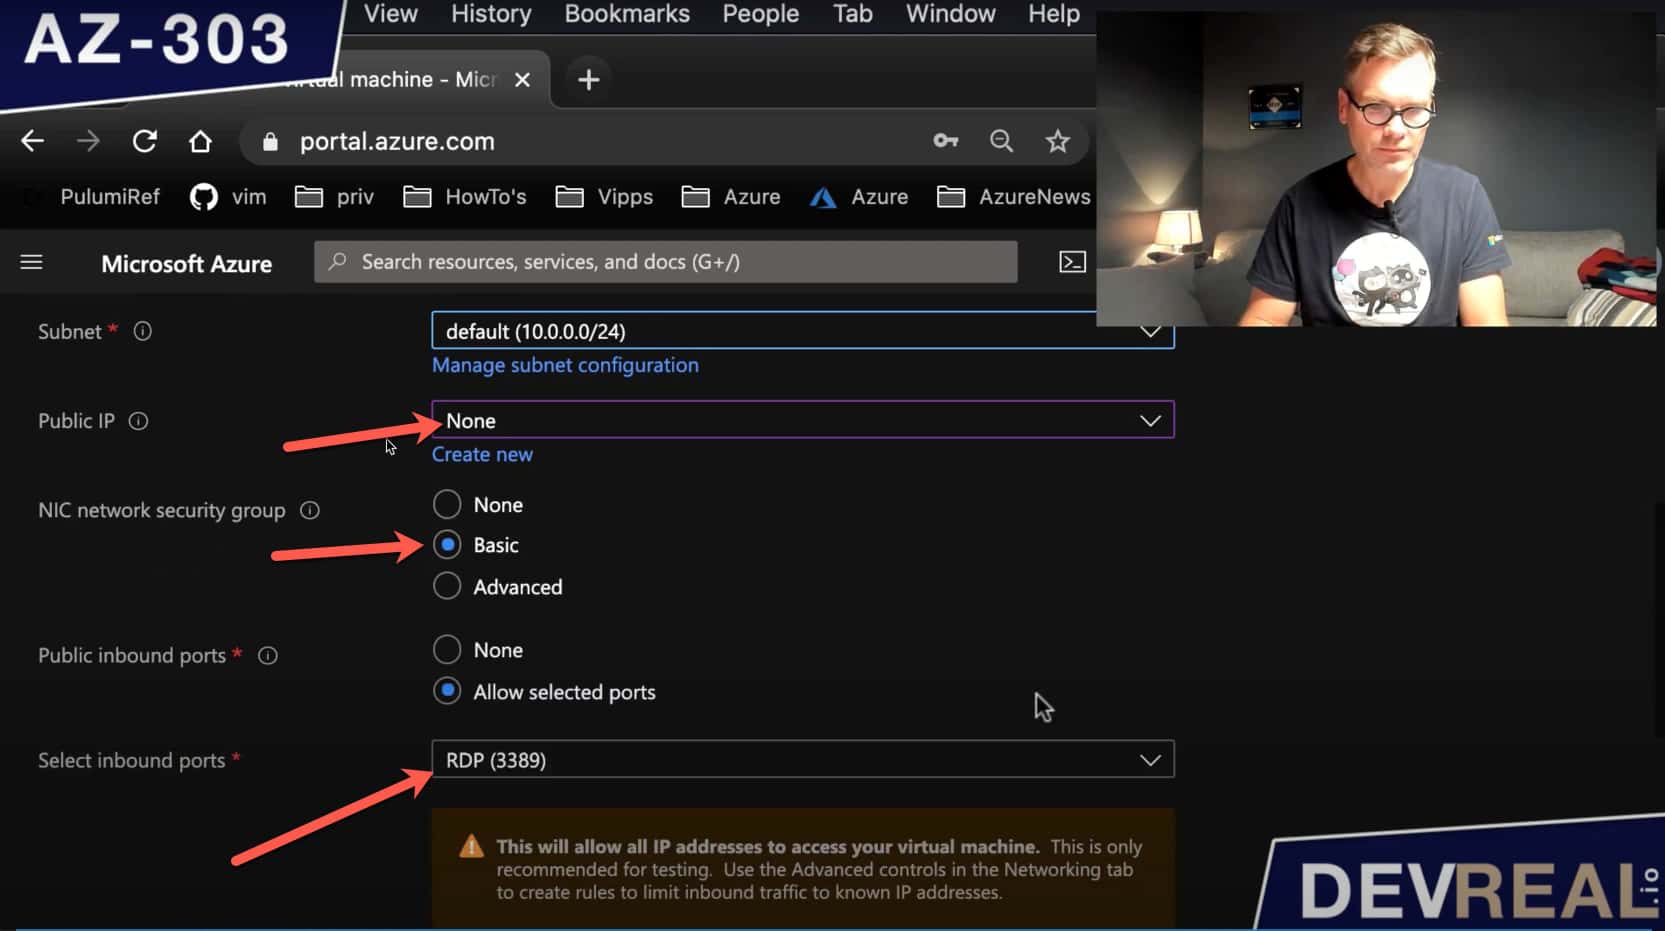 Configuring the VM
Now as everything is in place, let’s take a look at the resources that got created.
- Azure Bastion as our jump host
- Public IP address for Azure Bastion
- Windows Server 2016 Datacenter VM
- Network Security Group (NSG)
- Network Interface
- OS Disk for the Virtual Machine
- Virtual Network (VNet)
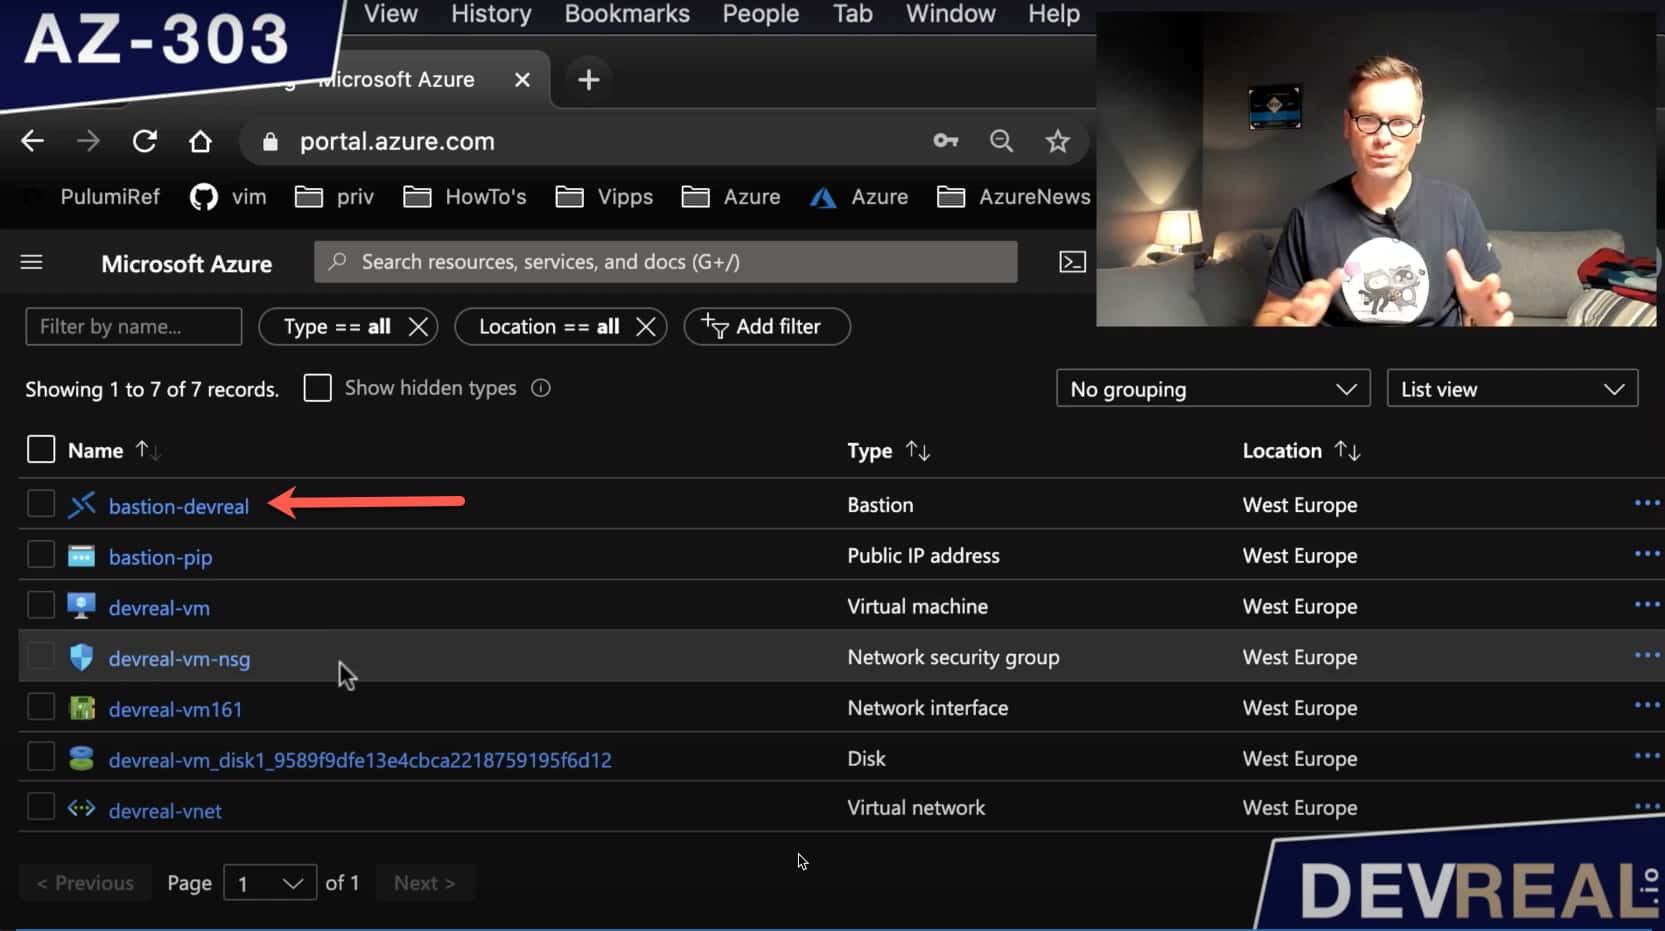 Overview of all created Azure resources
We won’t use this resource directly to connect to our VM. First, we take a look at the NSG resource devreal-vm-nsg which is connected directly to the VM. NSGs can be connected to subnets as well.
 Overview of all created Azure resources 2
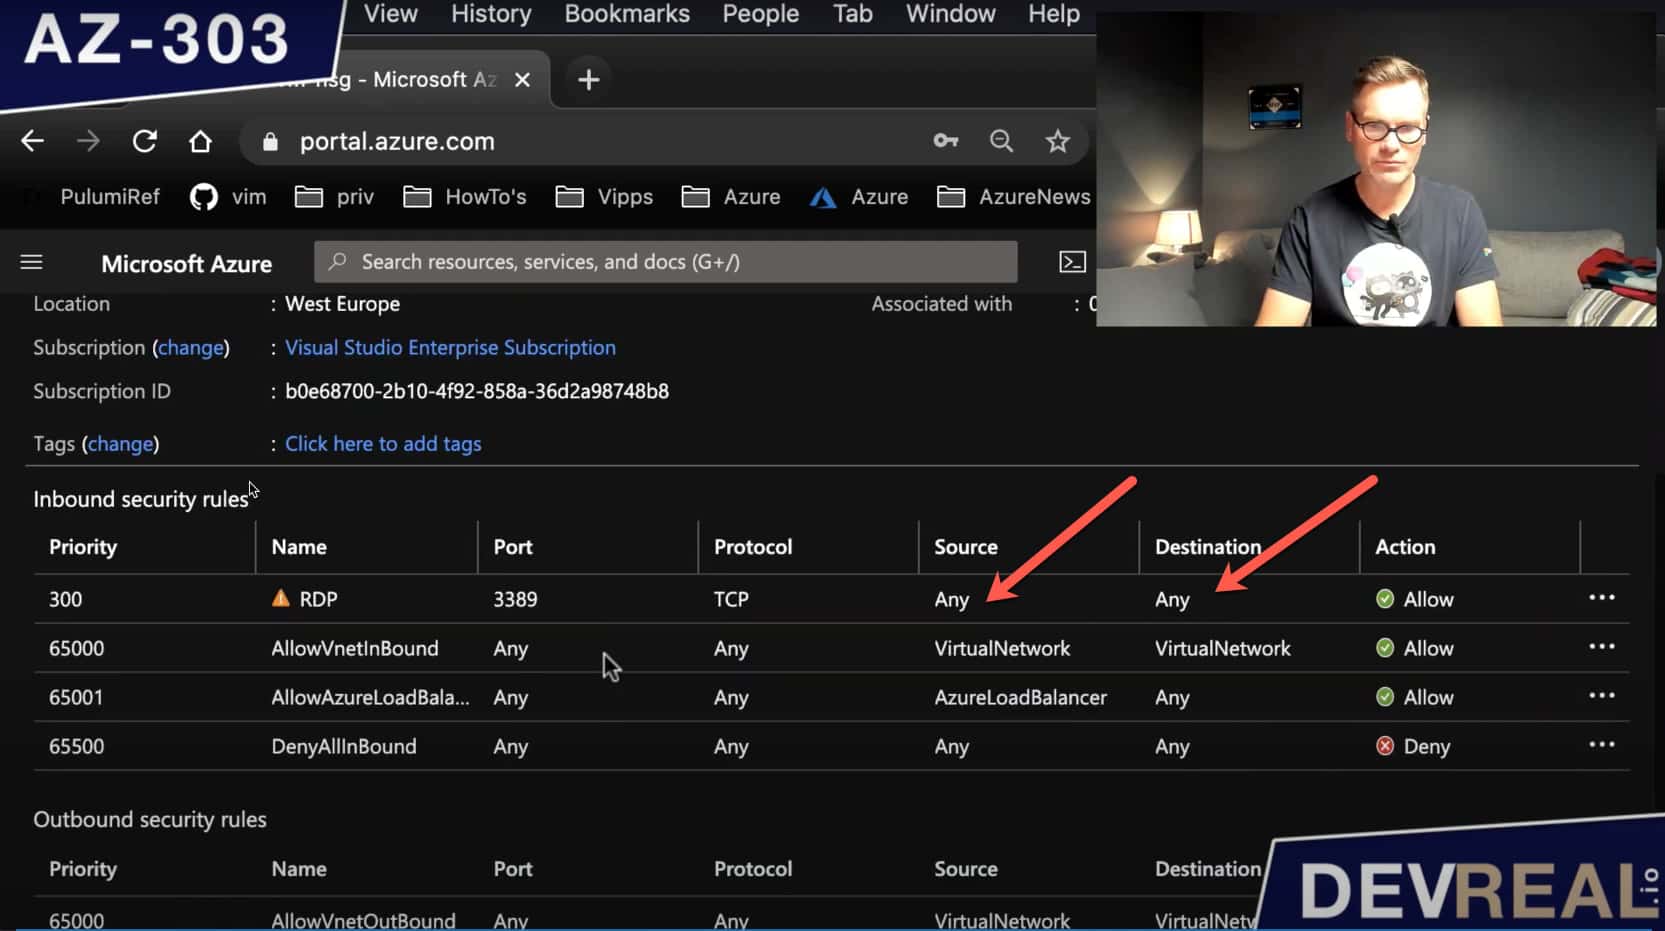
The VM allows traffic on port 3389 as we already know. The insecure setting now is that the VM allows packages from any source. To be more secure we should be more specific. Security is important and the reason why we set up Azure Bastion in the first place.
 NSG overwiew
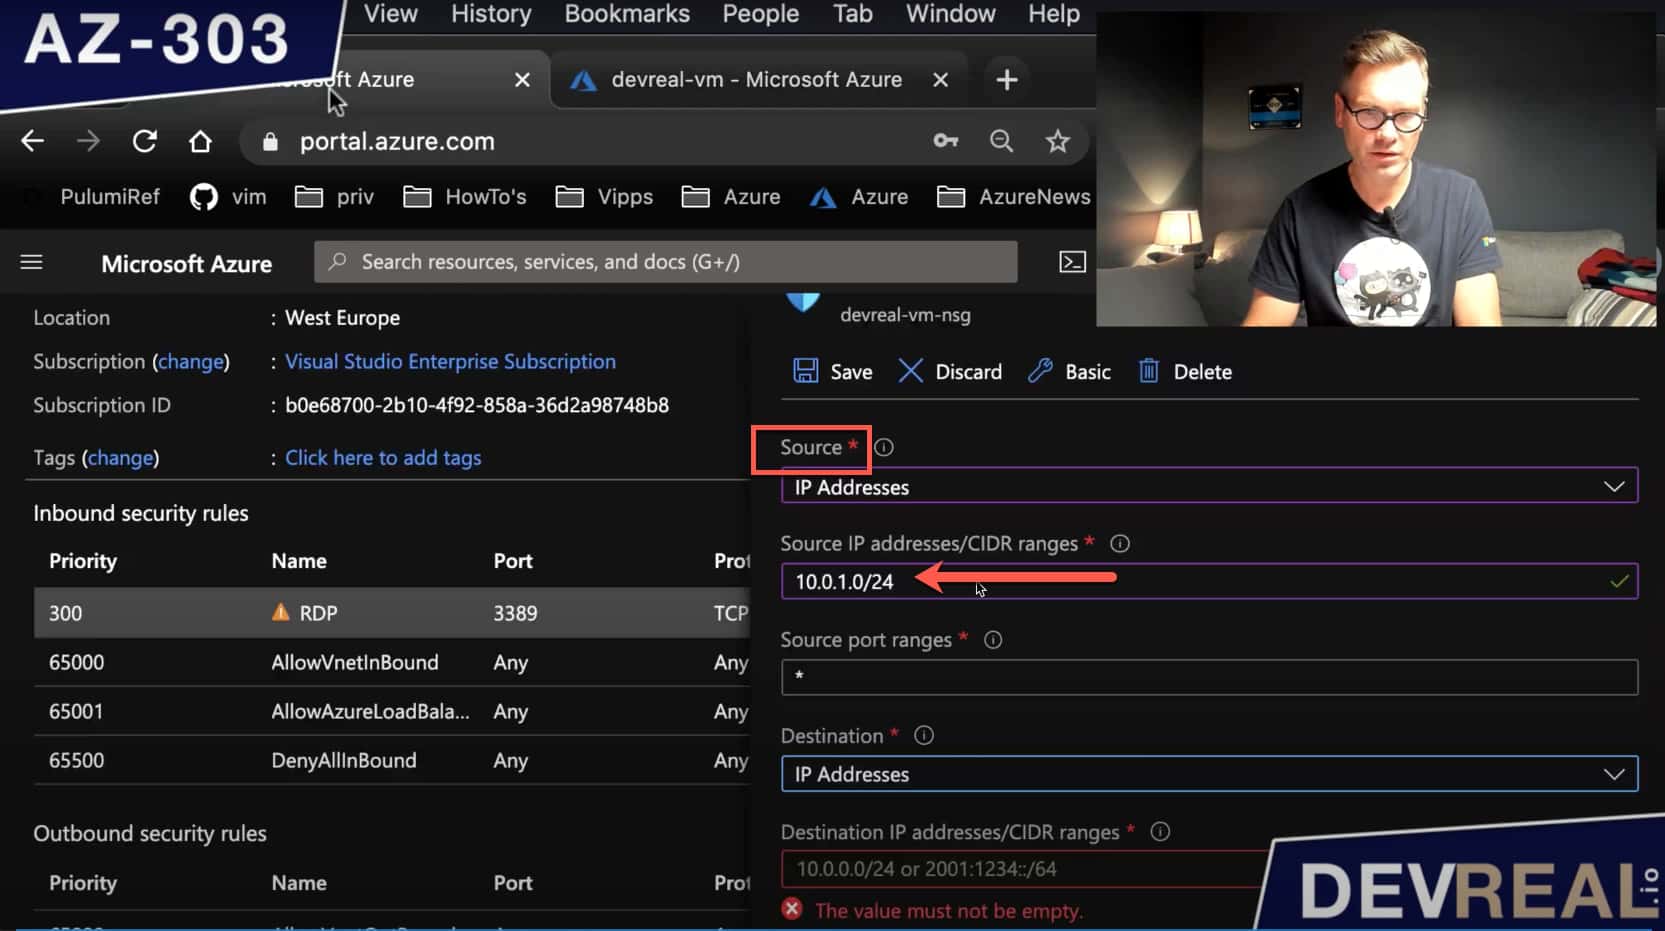
As the source we allow the IP addresses range of the AzureBastionSubnet-subnet.
 Configuring NSG source
As the destination, we set the IP address and the port of our VM.
 Configuring NSG destination
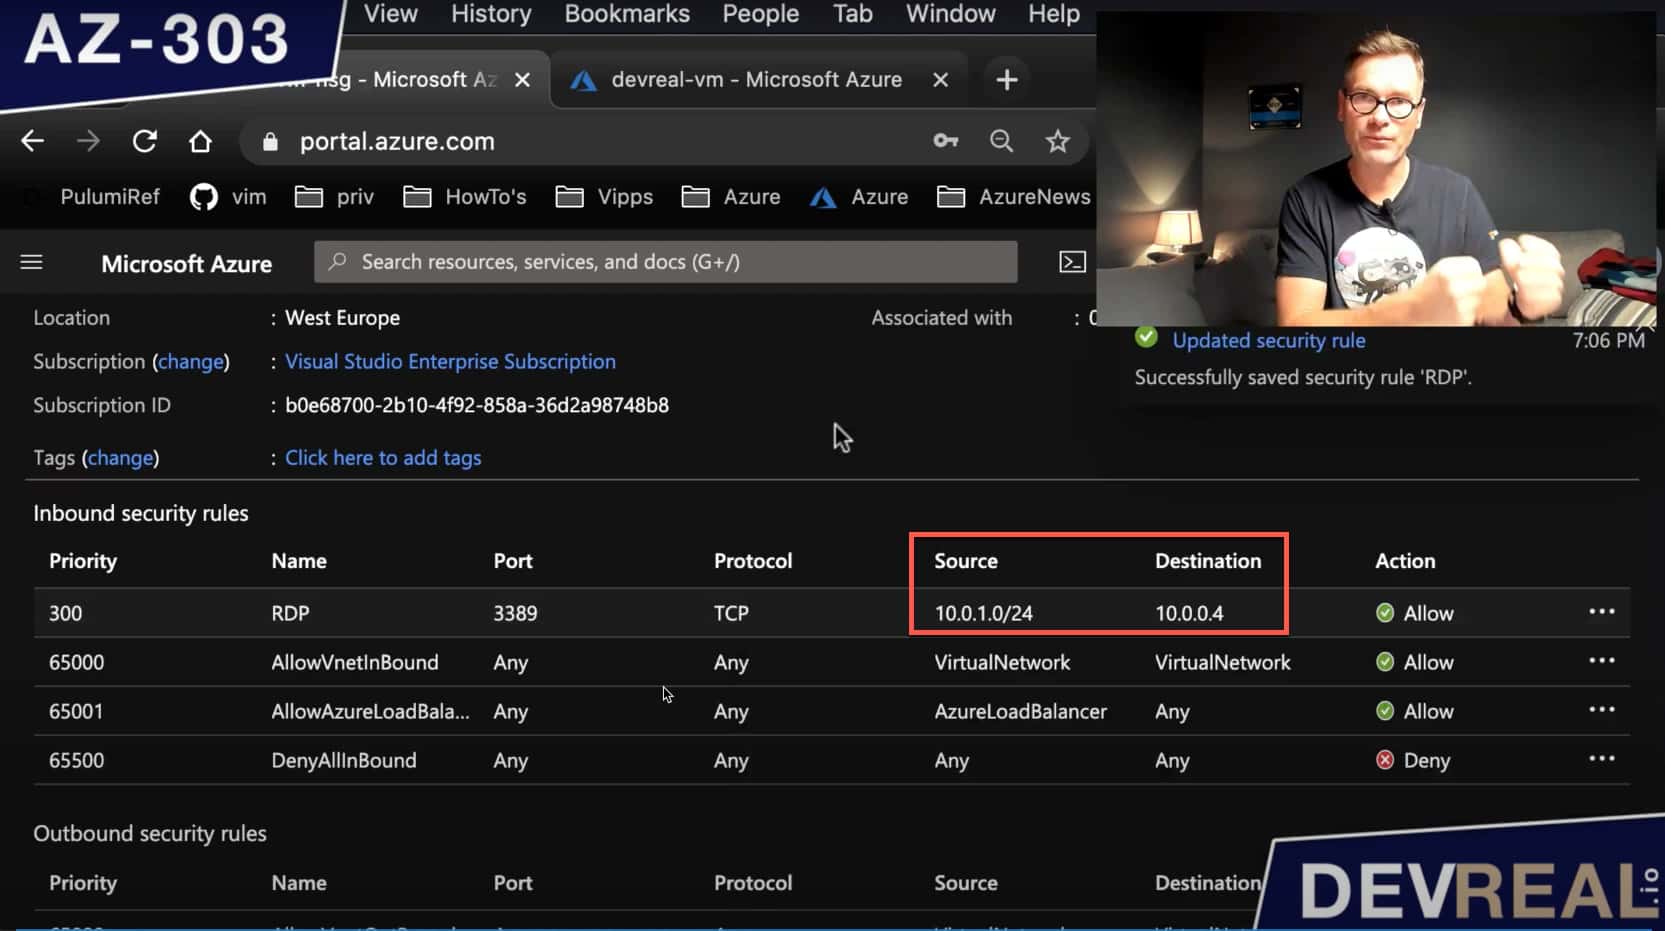
Here’s a better overview of what we have just configured.
 Overview of changed NSG rule
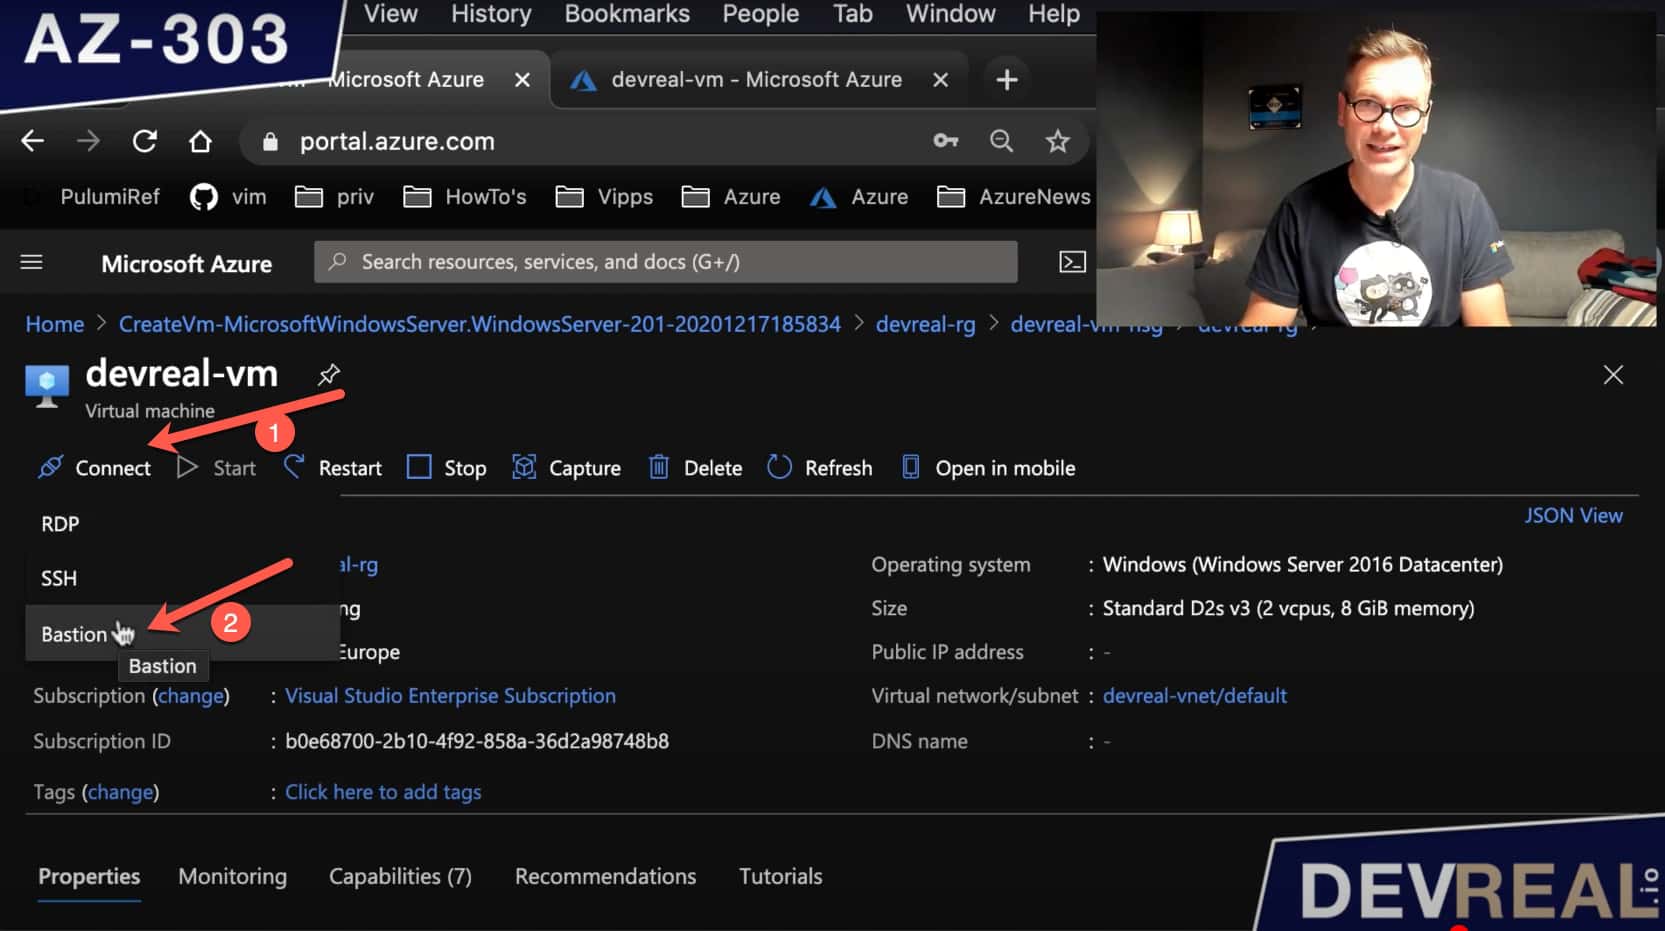
Finally, we can connect to our VM. Click into the Virtual Machine and click on Connect. Then choose Bastion … give it your credentials that you have set when configuring the VM …
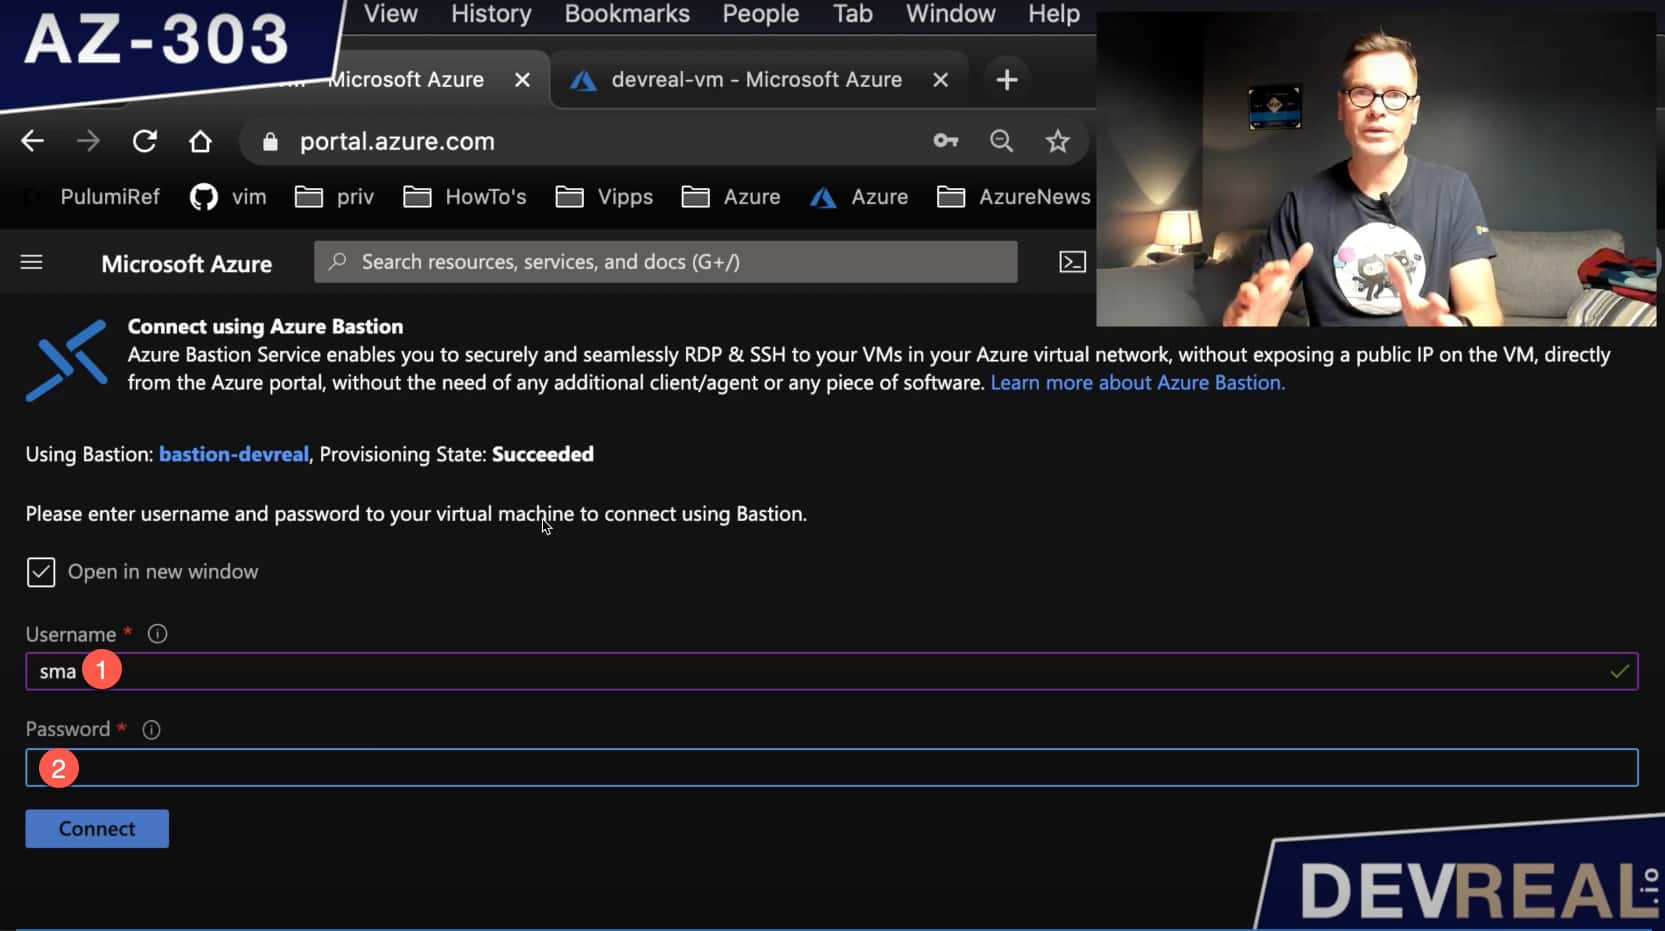 Set credentials for VM
… and vóila, you have logged in to your Windows Server 2016 Datacenter VM without using a public IP address of the VM, but with Azure Bastion.
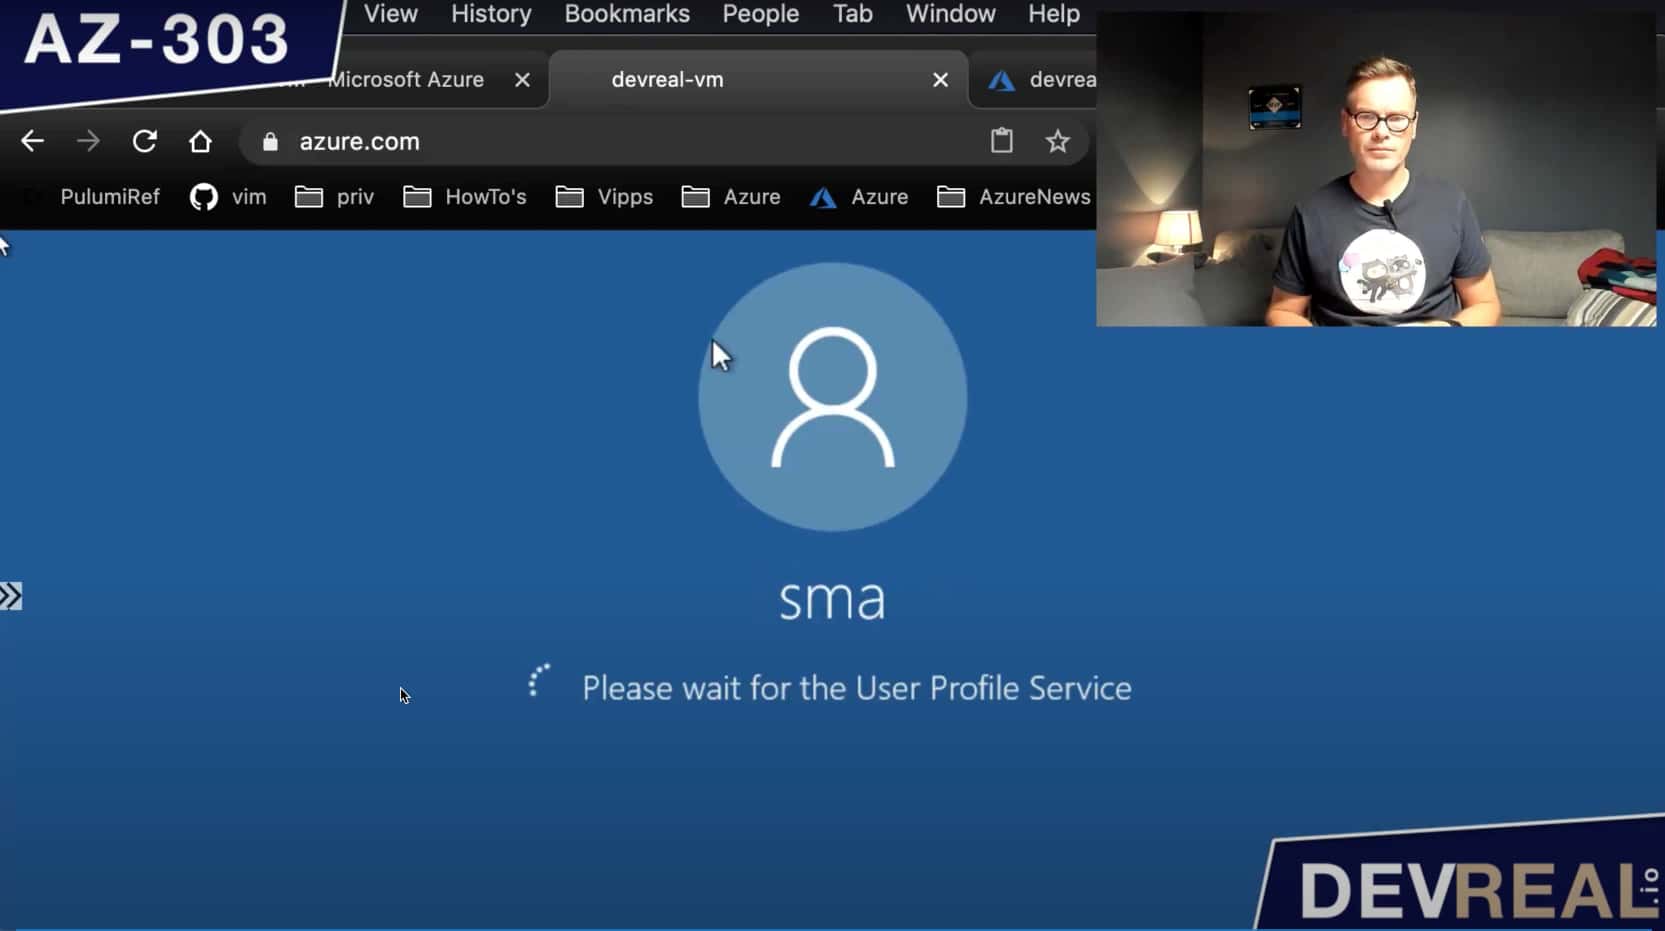 Logged in to Windows Server 2016 Datacenter VM